Receive Webhooks
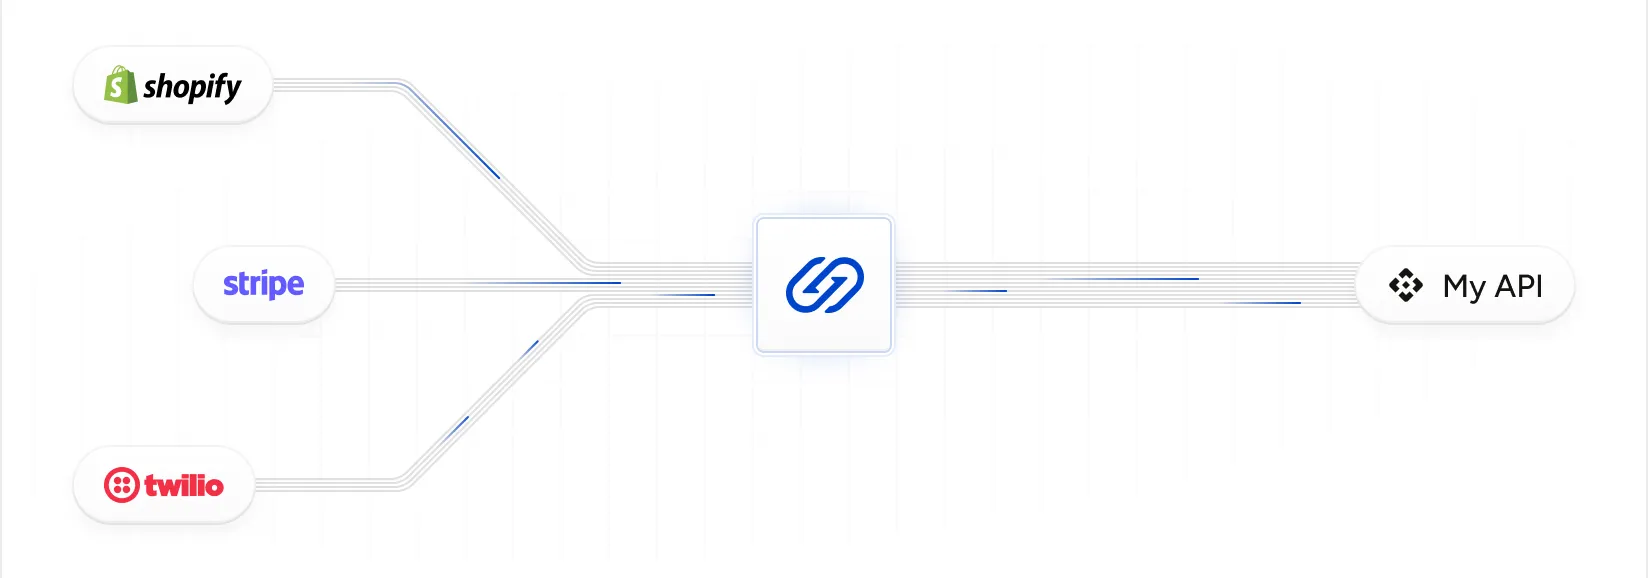
In this quickstart, you'll learn how to receive webhooks from a source via Hookdeck. A source may be a third-party, such as Shopify, Stripe, Twilio, or another internal service that triggers a webhook to represent an event, such as a change in data. You'll begin receiving the webhook in your local development environment using the Hookdeck CLI and then move to receiving the webhook in your production environment.
You will walk through these steps:
- Ensure you have some prerequisites in place before you begin
- Set up a Connection within Hookdeck
- Receive a test webhook on Hookdeck
- Use the Hookdeck CLI to receive a webhook on your local development server
- Receive a webhook from a third-party provider to your local development server
- Setup end-to-end delivery of the webhook from the third-party to your production webhook-consuming endpoint
1. Before you begin
Signup for a Hookdeck account and create a Hookdeck Organization.
Get the API key from your project secrets if you prefer to use the Hookdeck from the terminal via cURL requests.
Install the Hookdeck CLI and run hookdeck login.
2. Create a connection
A Connection consists of a Source, optional Rules, and a Destination. It defines the flow of the webhook event, from receipt through to delivery.
Run the following command to create a Connection within your Hookdeck project:
curl --location 'https://api.hookdeck.com/2023-07-01/connections' \
--header 'Content-Type: application/json' \
--header 'Accept: application/json' \
--header 'Authorization: Bearer YOUR_PROJECT_API_KEY' \
--data '{
  "name": "inbound-quickstart-connection",
  "source": {
    "name": "inbound-webhook"
  },
  "destination": {
    "name": "outbound-webhook",
    "url": "https://mock.hookdeck.com"
  }
}'
The cURL command creates a Connection named inbound-quickstart-connection, a Source with the name inbound-webhook, and a Destination with the name outbound-webhook and url with the value https://mock.hookdeck.com.
The response will be formatted as follows:
{
  "id": "web_oPymMJ0isyuS",
  "team_id": "tm_SAN9hnAiGLbI",
  "disabled_at": null,
  "updated_at": "2023-11-18T16:52:43.897Z",
  "created_at": "2023-11-18T16:52:44.096Z",
  "paused_at": null,
  "name": "inbound-quickstart-connection",
  "rules": [],
  "description": null,
  "destination": {
    "id": "des_wNYxQXpkYHcM",
    "team_id": "tm_SAN9hnAiGLbI",
    "url": "https://mock.hookdeck.com",
    "disabled_at": null,
    "updated_at": "2023-11-18T16:52:43.897Z",
    "created_at": "2023-11-18T16:52:43.903Z",
    "rate_limit": null,
    "rate_limit_period": "second",
    "cli_path": null,
    "path_forwarding_disabled": false,
    "name": "outbound-webhook",
    "http_method": null,
    "auth_method": { "type": "HOOKDECK_SIGNATURE", "config": {} },
    "description": null
  },
  "source": {
    "id": "src_KUdNgMByl0uP",
    "team_id": "tm_SAN9hnAiGLbI",
    "disabled_at": null,
    "updated_at": "2023-11-18T16:52:43.897Z",
    "created_at": "2023-11-18T16:52:43.905Z",
    "name": "inbound-webhook",
    "allowed_http_methods": ["POST", "PUT", "PATCH", "DELETE"],
    "custom_response": null,
    "description": null,
    "url": "{YOUR_SOURCE_URL}",
    "verification": null
  },
  "full_name": "inbound-webhook -> inbound-quickstart-connection"
}
The cURL command has created a connection. The source.url value is the URL used to receive webhooks. The destination.url value is the URL where Hookdeck will deliver the webhook event payloads to. In the cURL request, you set the Destination URL to https://mock.hookdeck.com, which is a destination you can use for testing that receives the HTTP request and returns a 200 response.
From the Connections section of the Hookdeck dashboard, click the button.
In the Create Connection page, under Configure a Source, enter inbound-webhook.
Under Configure a Destination enter the Name outbound-webhook and set the Destination Type to Mock API.
Within the Set Connection Name enter inbound-quickstart-connection.
Click the button to create the Connection and close the Connection Created dialog that appears by clicking the button.
Open the Connections section for your project in the Hookdeck dashboard to see the visual representation of the connection you created.

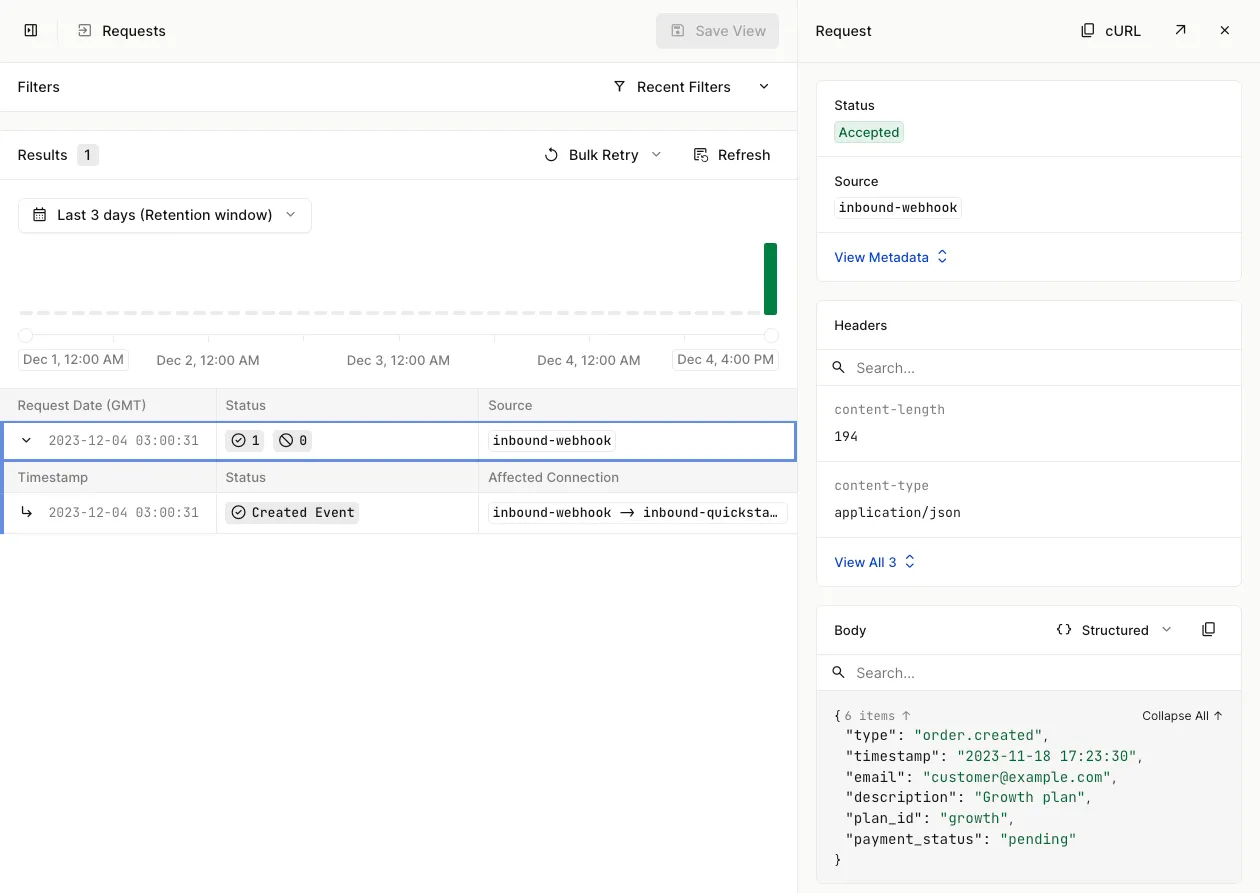
3. Send a test inbound webhook to Hookdeck
Make a POST request to the inbound webhook URL from the source.url value above:
curl --location '{YOUR_SOURCE_URL}' \
--header 'Content-Type: application/json' \
--data-raw '{
    "type": "order.created",
    "timestamp": "2023-11-18 17:23:30",
    "email": "customer@example.com",
    "description": "Growth plan",
    "plan_id": "growth",
    "payment_status": "pending"
}'
The response will look similar to the following:
{
  "status": "SUCCESS",
  "message": "Request successfully handled. Request ID: req_pSO2eEXILyN4CxxphL3I",
  "request_id": "req_pSO2eEXILyN4CxxphL3I"
}
The status with a value of SUCCESS indicates that Hookdeck has successfully ingested the HTTP request.
Open the Requests section of Hookdeck dashboard to see the request within the UI.
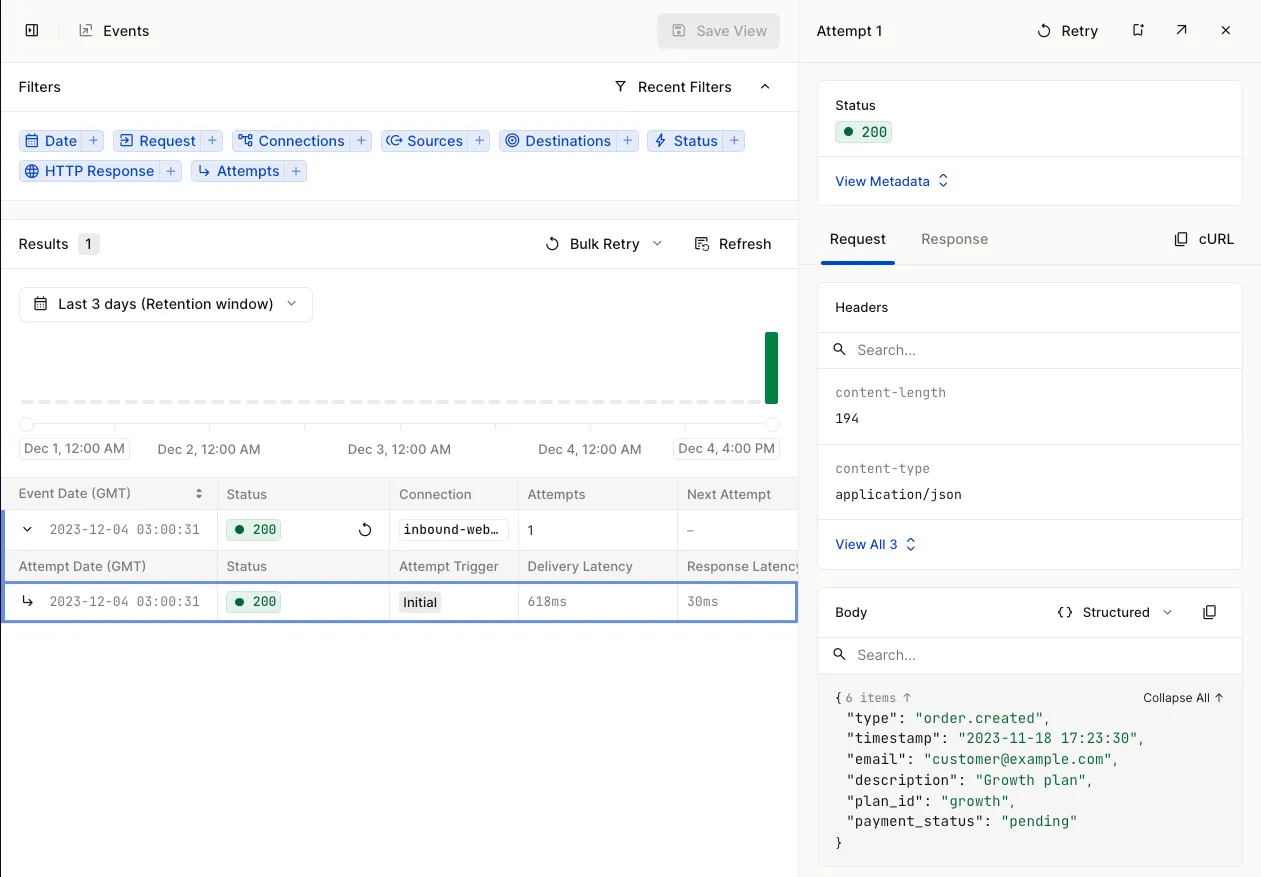
Next, open the Events section of the Hookeck dashboard. Click on the Event to expand the section to see the Attempts made to deliver the event to a webhook endpoint.
4. Receive a webhook on your localhost using the Hookdeck CLI
To receive a webhook locally, first start your local development server:
Run the following to get the code and install the app’s dependencies:
npx degit hookdeck/quickstarts/typescript/inbound hookdeck-inbound
cd hookdeck-inbound
npm i
Then, run the application:
npm run dev
You will see output as follows:
> inbound@1.0.0 dev
> nodemon index.ts

[nodemon] 3.0.1
[nodemon] to restart at any time, enter `rs`
[nodemon] watching path(s): *.*
[nodemon] watching extensions: ts,json
[nodemon] starting `ts-node index.ts`
🪝 Server running at http://localhost:3030
Get the Hookdeck quickstart code:
git clone https://github.com/hookdeck/quickstarts.git
cd quickstarts/python/inbound
Create a new virtualenv, activate it, and Install the application dependencies:
virtualenv venv
source venv/bin/activate
pip install -r requirements.txt
Run the app:
python app.py
The output will look as follows:
python app.py
 * Serving Flask app 'app'
 * Debug mode: on
INFO:werkzeug:WARNING: This is a development server. Do not use it in a production deployment. Use a production WSGI server instead.
 * Running on http://127.0.0.1:5000
INFO:werkzeug:Press CTRL+C to quit
INFO:werkzeug: * Restarting with stat
WARNING:werkzeug: * Debugger is active!
INFO:werkzeug: * Debugger PIN: 530-477-256
Get the Hookdeck quickstart code:
git clone https://github.com/hookdeck/quickstarts.git
cd quickstarts/go/inbound
Run the app:
go run .
The output will look as follows:
go run .
[GIN-debug] [WARNING] Creating an Engine instance with the Logger and Recovery middleware already attached.

[GIN-debug] [WARNING] Running in "debug" mode. Switch to "release" mode in production.
 - using env:   export GIN_MODE=release
 - using code:  gin.SetMode(gin.ReleaseMode)

[GIN-debug] POST   /webhook                  --> main.main.func1 (3 handlers)
🪝 Server running at http://localhost:3030[GIN-debug] [WARNING] You trusted all proxies, this is NOT safe. We recommend you to set a value.
Please check https://pkg.go.dev/github.com/gin-gonic/gin#readme-don-t-trust-all-proxies for details.
[GIN-debug] Listening and serving HTTP on :3030
Next, use the Hookdeck CLI to create a connection to route events from the inbound-webhook Source to the local development server. For the next step, you'll need to know the port your dev server is listening on.
Assuming your dev server is running on port 3030, run the following command:
hookdeck listen 3030 inbound-webhook
When prompted for a path, enter /webhook.
When prompted for a label, enter local.
You will see a command output similar to the following:
? What path should the webhooks be forwarded to (ie: /webhooks)? /webhook
? What's your connection label (ie: My API)? local

Dashboard
👉 Inspect and replay webhooks: https://dashboard.hookdeck.com?team_id=tm_SAN9hnAiGLbI

inbound-webhook Source
🔌 Webhook URL: {YOUR_SOURCE_URL}

Connections
local forwarding to /webhook

> Ready! (^C to quit)
Open the Connections section for your project in the Hookdeck dashboard to see the Hookdeck CLI within the visual representation of the connection.

With your dev server running and the Hookdeck CLI setup to listen to events from the inbound-webhook source, you can test receiving a webhook to your localhost:
curl --location '{YOUR_SOURCE_URL}' \
--header 'Content-Type: application/json' \
--data-raw '{
    "type": "order.updated",
    "timestamp": "2023-11-18 17:25:15",
    "email": "customer@example.com",
		"description": "Hookdeck Growth plan",
		"plan_id": "growth",
		"payment_status": "paid"
}'
After running the cURL command, you will see the request logged by the Hookdeck CLI:
2023-11-19 20:36:53 [200] POST http://localhost:3030/webhook | https://dashboard.hookdeck.com/cli/events/evt_YhWPqX1QNKZrrrcybI
You'll also see the request logged by your development server:
{
  webhook_received: '2023-11-19T20:40:29.767Z',
  body: {
    type: 'order.updated',
    timestamp: '2023-11-18 17:25:15',
    email: 'customer@example.com',
    description: 'Hookdeck Growth plan',
    plan_id: 'growth',
    payment_status: 'paid'
  }
}
INFO:app:webhook_received 2023-11-19T20:40:29.767Z {
  "type": "order.updated",
  "timestamp": "2023-11-18 17:25:15",
  "email": "customer@example.com",
  "description": "Hookdeck Growth plan",
  "plan_id": "growth",
  "payment_status": "paid"
}
INFO:werkzeug:127.0.0.1 - - [19/Nov/2023 20:36:53] "POST /webhook HTTP/1.1" 200 -
2024/01/12 16:41:45 webhook_received: {
  type: 'order.updated',
  timestamp: '2023-11-18 17:25:15',
  email: 'customer@example.com',
  description: 'Hookdeck Growth plan',
  plan_id: 'growth',
  payment_status: 'paid'
}
5. Receive a webhook from a third-party provider to your local development server
This step assumes you have a third-party provider from which you want to receive a webhook.
Set the webhook URL within the third-party provider to point to your Hookdeck Source URL. Then, trigger the webhook, and you will see the webhook received by your local development environment. How you do this will depend on the provider, so follow their documentation.
Once the webhook is triggered, you will see the request logged in the Hookdeck dashboard in the Requests section:
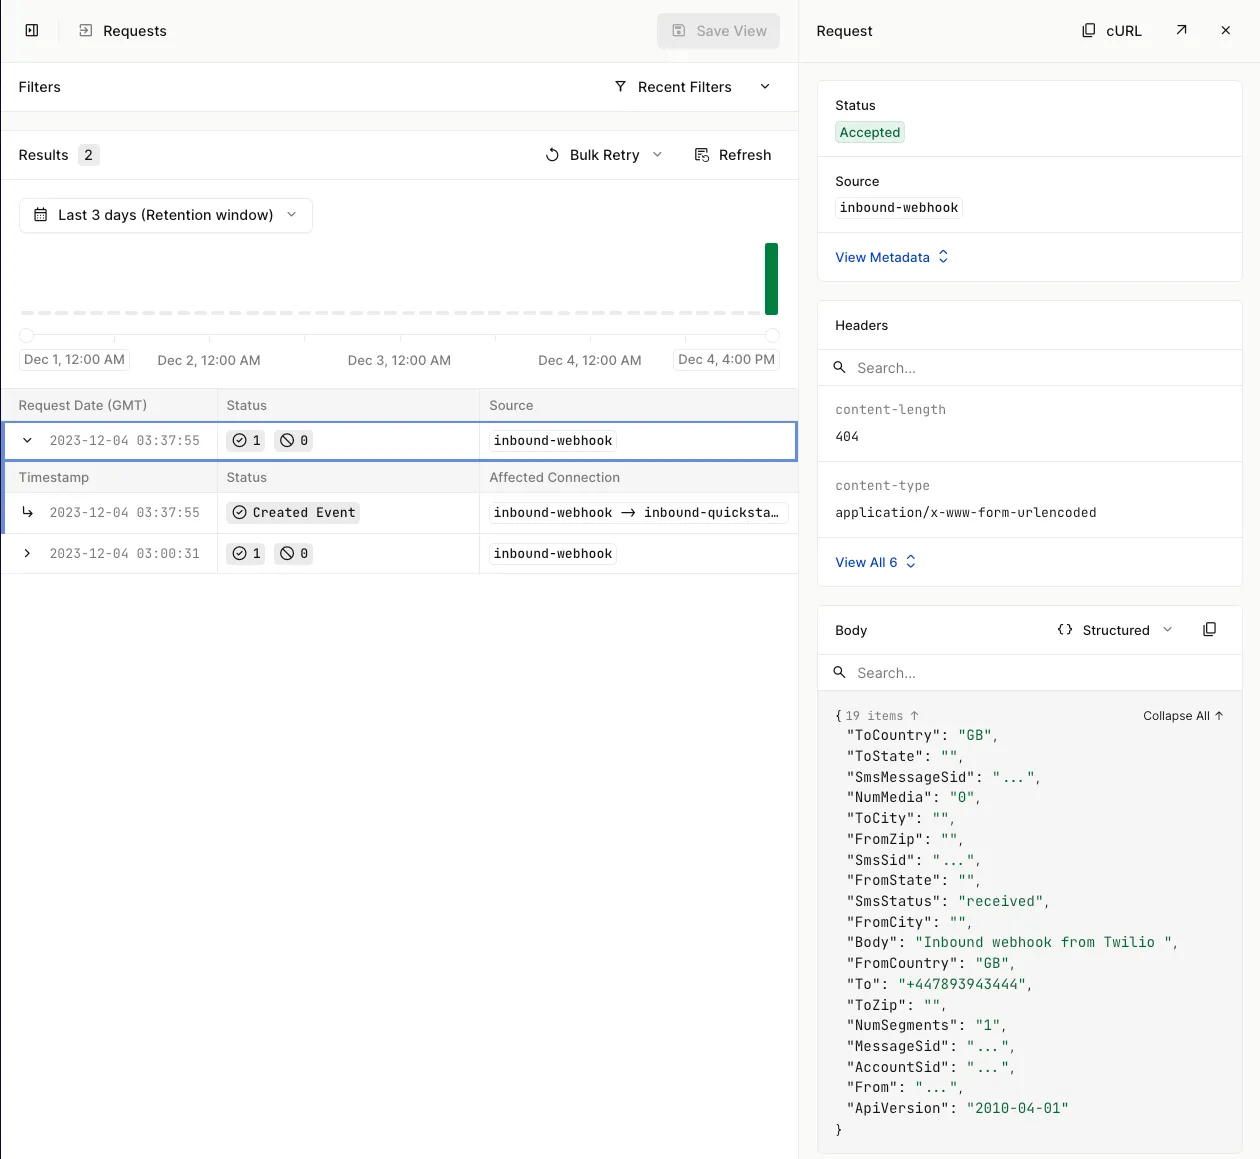
You will see an event in the Events section of the dashboard and a log message from the Hookdeck CLI.
You will also see a log message from your locally running server:
{
  webhook_received: '2023-12-04T21:30:03.938Z',
  body: {
    ToCountry: 'GB',
    ToState: '',
    NumMedia: '0',
    ToCity: '',
    FromZip: '',
    FromState: '',
    SmsStatus: 'received',
    FromCity: '',
    Body: 'Hookdeck inbound webhook from Twilio',
    FromCountry: 'GB',
    To: '+447700900406',
    ToZip: '',
    NumSegments: '1',
    From: '+447700900000',
    ApiVersion: '2010-04-01'
  }
}
INFO:app:webhook_received 2023-12-04T21:40:42.528631 {
  "ToCountry": "GB",
  "ToState": "",
  "NumMedia": "0",
  "ToCity": "",
  "FromZip": "",
  "FromState": "",
  "SmsStatus": "received",
  "FromCity": "",
  "Body": "Hookdeck inbound webhook from Twilio",
  "FromCountry": "GB",
  "To": "+447700900406",
  "ToZip": "",
  "NumSegments": "1",
  "From": "+447700900000",
  "ApiVersion": "2010-04-01"
}
2024/01/12 16:41:45 webhook_received: {
  "ToCountry": "GB",
  "ToState": "",
  "NumMedia": "0",
  "ToCity": "",
  "FromZip": "",
  "FromState": "",
  "SmsStatus": "received",
  "FromCity": "",
  "Body": "Hookdeck inbound webhook from Twilio",
  "FromCountry": "GB",
  "To": "+447700900406",
  "ToZip": "",
  "NumSegments": "1",
  "From": "+447700900000",
  "ApiVersion": "2010-04-01"
}
6. Deliver to your production webhook endpoint
This step assumes you have an application deployed that you want to receive a webhook.
Next, update the Destination URL for your inbound-quickstart-connection to your production webhook URL.
Run a PUT request to update your connection:
curl --location --request PUT 'https://api.hookdeck.com/2023-07-01/connections' \
--header 'Content-Type: application/json' \
--header 'Accept: application/json' \
--header 'Authorization: Bearer {YOUR_PROJECT_API_KEY}' \
--data '{
  "name": "inbound-quickstart-connection",
  "source": {
    "name": "inbound-webhook"
  },
  "destination": {
    "name": "outbound-webhook",
    "url": "<YOUR_WEBHOOK_URL>"
  }
}'
You will see a response similar to the following:
{
  "id": "web_oPymMJ0isyuS",
  "team_id": "tm_SAN9hnAiGLbI",
  "disabled_at": null,
  "updated_at": "2023-11-20T12:42:56.433Z",
  "created_at": "2023-11-18T16:52:44.096Z",
  "paused_at": null,
  "name": "inbound-quickstart-connection",
  "rules": [],
  "description": null,
  "destination": {
    "id": "des_wNYxQXpkYHcM",
    "team_id": "tm_SAN9hnAiGLbI",
    "url": "https://example.com/webhook",
    "disabled_at": null,
    "updated_at": "2023-11-20T12:42:56.250Z",
    "created_at": "2023-11-18T16:52:43.903Z",
    "rate_limit": null,
    "rate_limit_period": "second",
    "cli_path": null,
    "path_forwarding_disabled": false,
    "name": "outbound-webhook",
    "http_method": null,
    "auth_method": {
      "type": "HOOKDECK_SIGNATURE",
      "config": {}
    },
    "description": null
  },
  "source": {
    "id": "src_KUdNgMByl0uP",
    "team_id": "tm_SAN9hnAiGLbI",
    "disabled_at": null,
    "updated_at": "2023-11-20T12:42:56.252Z",
    "created_at": "2023-11-18T16:52:43.905Z",
    "name": "inbound-webhook",
    "allowed_http_methods": ["POST", "PUT", "PATCH", "DELETE"],
    "custom_response": null,
    "description": null,
    "url": "{YOUR_SOURCE_URL}",
    "verification": null
  },
  "full_name": "inbound-webhook -> inbound-quickstart-connection"
}
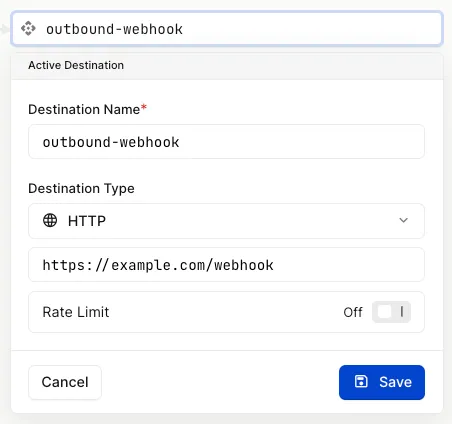
From the Connection section, click on the outbound-webhook Destination. Change the Destination Type to HTTP and update the URL to reference your production URL and click .
With the connection updated, you can trigger webhook events from the third-party, and they will be delivered to your deployed application.
Trigger an event from the third-party to deliver the event via Hookdeck to your production webhook URL.
As before, you can check this in both the Hookdeck dashboard Requests and Events sections.
What you have learned
By following this quickstart, you set up a Connection with Hookdeck and tested sending webhooks to Hookdeck's Mock API endpoint. You then ran a local development server and used the Hookdeck CLI to receive webhooks to your local environment. Finally, you updated the Connection to deliver webhooks to a live deployed application.
Where next?
You've just scratched the surface of Hookdeck. So, try out the following features:
- Set up a rate limit on your Destination to manage the number of requests your server has to manage per second.
- Securely receive webhooks by setting up Hookdeck webhook signature verification.
- Define your retry logic for those occasions when your deployed application isn't available or can't accept a webhook request.
- Use a Filter to select which webhook events will be delivered to your destination. For example, if there is a
typeon the event payload, define whichtypevalues should be delivered. - Add a transformation to your Connection. For example, some requests may be sent with a
content-typeofapplication/x-www-form-urlencoded. Use a transformation to change thecontent-typetoapplication/jsonand Hookdeck will do the rest.